Envoy 介绍与用法

Envoy 使用

Envoy的介绍

Envoy诞生于云原生流行之时,当微服务开发架构成为主流,需要管理和维护的应用越来越多,服务与服务之间的相互通信越来越复杂。Envoy的出现,提供了一个通用的代理层,处理不同服务之间的网络通信,并且通过强大的控制平台来管理这些通信。

Envoy是一个面向大规模现代服务架构而设计的7层负载和消息总线。主要信念是认为网络对应用程序应该是透明的。当出现网络和应用问题时,应该能够轻松找到问题的原因。其实Envoy的本质是网络代理,它可以代理你的应用服务。它主要的功能涵盖:L3/L4/L7代理、HTTP/2的支持、HTTP/3目前处于alpha阶段、GRPC支持、服务发现和动态配置、健康检查、负载均衡、流量管理、边缘代理支持、可观测性。

Envoy的安装

目前主流的服务网格是Istio,Envoy作为它的网络代理一部分。实际上,Envoy可以单独作为一个代理服务,部署在Kubernetes集群中。

首先我们准备一份Envoy的配置文件,为之后创建configmap:

1
2
3
4
5
6
7
8
9
10
11
12
13
14
15
16
17
18
19
20
21
22
23
24
25
26
27
28
29
30
31
32
33
34
35
36
37
38
39
40
41
42
43
44
45
46
47
48
49
50
51
52
53
54
55
56
57
58
59
60
61
# 配置文件:envoy.yaml
admin:
address:
socket_address: { address: 0.0.0.0, port_value: 9901 }

static_resources:
listeners:
- name: listener_0
address:
socket_address: { address: 0.0.0.0, port_value: 10000 }
filter_chains:
- filters:
- name: envoy.filters.network.http_connection_manager
typed_config:
"@type": type.googleapis.com/envoy.extensions.filters.network.http_connection_manager.v3.HttpConnectionManager
stat_prefix: ingress_http
codec_type: AUTO
http_filters:
- name: envoy.filters.http.router
typed_config:
"@type": type.googleapis.com/envoy.extensions.filters.http.router.v3.Router
route_config:
name: local_route
virtual_hosts:
- name: local_service
domains: ["*"]
routes:
- match: { prefix: "/" }
route: { cluster: some_service }
- name: test_service
domains: ["ng2.ocft.com"]
routes:
- match: { prefix: "/" }
route: { cluster: test_service }
clusters:
- name: some_service
connect_timeout: 0.25s
type: LOGICAL_DNS
lb_policy: ROUND_ROBIN
load_assignment:
cluster_name: some_service
endpoints:
- lb_endpoints:
- endpoint:
address:
socket_address:
address: nginx1
port_value: 80
- name: test_service
connect_timeout: 0.25s
type: LOGICAL_DNS
lb_policy: ROUND_ROBIN
load_assignment:
cluster_name: test_service
endpoints:
- lb_endpoints:
- endpoint:
address:
socket_address:
address: nginx2
port_value: 80

接下来定义Envoy:

1
2
3
4
5
6
7
8
9
10
11
12
13
14
15
16
17
18
19
20
21
22
23
24
25
26
27
28
29
# envoy-deploy.yaml

apiVersion: apps/v1
kind: Deployment
metadata:
labels:
run: envoy
name: envoy
spec:
replicas: 1
selector:
matchLabels:
run: envoy
template:
metadata:
labels:
run: envoy
spec:
containers:
- image: envoyproxy/envoy-dev
name: envoy
volumeMounts:
- name: envoy-config
mountPath: "/etc/envoy"
readOnly: true
volumes:
- name: envoy-config
configMap:
name: envoy-config

执行命令:

1
2
3
4
# kubectl create deploy nginx1 --iamge=nginx:alpine
kubectl create configmap envoy-config --from-file=envoy.yaml
kubectl create -f envoy-deploy.yaml
kubectl expose deploy envoy --selector run=envoy --port=10000 --type=NodePort

现在你可以通过访问curl localhost:10000来访问服务了。

ps: 你可以把9901端口代理出来,然后访问envoy的管理台页面;envoy中的配置文件,需要创建deployment之后,创建svc,不然会出现访问不到。

Envoy的术语

参考:

原文:https://www.envoyproxy.io/docs/envoy/latest/intro/arch_overview/intro/terminology

中文:https://cloudnative.to/envoy/intro/arch_overview/intro/terminology.html

关于Envoy的几个专业术语:

  1. Host:主机,能够进行网络通信的实体。主要指引用程序
  2. Downstream:下游
  3. Upstream:上游
  4. Listener:监听器
  5. Cluster:集群
  6. Mesh:网格
  7. Runtime configuration:运行时配置

Envoy主要使用单进程-多线程架构。一个primary线程处理各种轻量协调任务,同时多个worker线程处理监听、过滤、转发。建议将worker线程数配置为物理机器的线程数。

Envoy的基本配置

以下是一份完整envoy的TCP/HTTP配置文档:

  1. 创建configmap
1
2
3
4
5
6
7
8
9
10
11
12
13
14
15
16
17
18
19
20
21
22
23
24
25
26
27
28
29
30
31
32
33
34
35
36
37
38
39
40
41
42
43
44
45
46
47
48
49
50
51
52
53
54
55
56
57
58
59
60
61
62
63
64
65
66
67
68
69
70
71
72
73
74
75
76
77
78
79
80
81
82
83
84
85
86
87
88
89
90
# envoy-config.yaml
admin:
address:
socket_address: { address: 127.0.0.1, port_value: 9901 }

static_resources:
listeners:
- name: http_listener
address:
socket_address:
address: 0.0.0.0
port_value: 10000
filter_chains:
- filters:
- name: envoy.filters.network.http_connection_manager
typed_config:
"@type": type.googleapis.com/envoy.extensions.filters.network.http_connection_manager.v3.HttpConnectionManager
stat_prefix: ingress_http
codec_type: AUTO
http_filters:
- name: envoy.filters.http.router
typed_config:
"@type": type.googleapis.com/envoy.extensions.filters.http.router.v3.Router
route_config:
name: local_route
virtual_hosts:
- name: ng1_service
domains: ["*"]
routes:
- match: { prefix: "/" }
route: { cluster: ng1_service }
- name: ng2_service
domains: ["ng2.chenzhijun.top"]
routes:
- match: { prefix: "/" }
route: { cluster: ng2_service }
- name: tcp_listener
address:
socket_address:
address: 0.0.0.0
port_value: 5236
filter_chains:
- filters:
- name: envoy.filters.network.tcp_proxy
typed_config:
"@type": type.googleapis.com/envoy.extensions.filters.network.tcp_proxy.v3.TcpProxy
stat_prefix: tcp_proxy
cluster: proxy_cluster
clusters:
- name: ng1_service
connect_timeout: 0.25s
type: LOGICAL_DNS
lb_policy: ROUND_ROBIN
load_assignment:
cluster_name: ng1_service
endpoints:
- lb_endpoints:
- endpoint:
address:
socket_address:
address: nginx1
port_value: 80
- name: ng2_service
connect_timeout: 0.25s
type: LOGICAL_DNS
lb_policy: ROUND_ROBIN
load_assignment:
cluster_name: ng2_service
endpoints:
- lb_endpoints:
- endpoint:
address:
socket_address:
address: nginx2
port_value: 80
- name: proxy_cluster
connect_timeout: 0.25s
type: strict_dns
lb_policy: round_robin
load_assignment:
cluster_name: proxy_cluster
endpoints:
- lb_endpoints:
- endpoint:
address:
socket_address:
address: 10.59.100.96
port_value: 5236

# kubectl create cm envoy-config --from-file=envoy.yaml
  1. 创建deploy
1
2
3
4
5
6
7
8
9
10
11
12
13
14
15
16
17
18
19
20
21
22
23
24
25
26
27
28
29
30
31
32
33
34
35
#envoy-deploy.yaml
apiVersion: apps/v1
kind: Deployment
metadata:
labels:
run: envoy
name: envoy
spec:
replicas: 1
selector:
matchLabels:
run: envoy
template:
metadata:
labels:
run: envoy
spec:
containers:
- image: 10.59.100.108/cbt-team/envoyproxy/envoy-dev
name: envoy
ports:
- containerPort: 8080
- containerPort: 5236
volumeMounts:
- name: envoy-config
mountPath: "/etc/envoy"
# readOnly: true
volumes:
- name: envoy-config
configMap:
name: envoy-config
imagePullSecrets:
- name: image-secret

#k apply -f envoy-deploy.yaml
  1. 创建service:
1
2
3
4
5
6
7
8
9
10
11
12
13
14
15
16
17
18
19
20
21
22
23
24
25
26
27
28
29
30
# envoy-svc.yaml
apiVersion: v1
kind: Service
metadata:
labels:
run: envoy
name: envoy
spec:
ports:
- name: port-10000
nodePort: 30574
port: 10000
protocol: TCP
targetPort: 10000
- name: port-9901
nodePort: 30575
port: 9901
protocol: TCP
targetPort: 9901
- name: port-5236
nodePort: 30578
port: 5236
protocol: TCP
targetPort: 5236
selector:
run: envoy
type: NodePort

# kubectl apply -f envoy-svc.yaml

  1. 对应服务创建,服务有TCP服务:10.59.100.96:5236,两个nginx deployment服务 nginx1, nginx2。这块可以直接使用kubectl create deploy; kubectl expose 创建就行。不做多的说明。10.59.100.96:5236是我用本地启动的一个MySQL服务。

image-20230703174939882

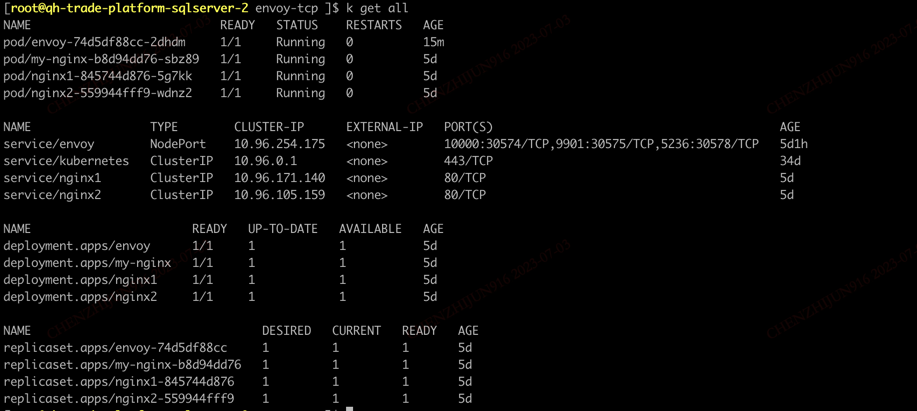
之后就可以测试服务是否正常了。用对应的主机ip和主机NodePort端口就行。

Envoy的动态配置

  1. 配置文件 envoy.yaml
1
2
3
4
5
6
7
8
9
10
11
12
13
# envoy.yaml
node:
id: envoy_front_proxy
cluster: my_Cluster
admin:
address:
socket_address: { address: 0.0.0.0, port_value: 9901 }
dynamic_resources:
lds_config:
path: /etc/envoy/conf.d/lds.yaml
cds_config:
path: /etc/envoy/conf.d/cds.yaml

  1. lds.yaml
1
2
3
4
5
6
7
8
9
10
11
12
13
14
15
16
17
18
19
20
21
22
23
24
25
26
27
28
29
30
31
32
33
34
35
36
37
38
39
40
41
42
43
44
45
46
47
48
49
50
51
52
53
54
55
# lds.yaml
resources:
- "@type": type.googleapis.com/envoy.config.listener.v3.Listener
name: http_listener
address:
socket_address: { address: 0.0.0.0, port_value: 10000 }
filter_chains:
- filters:
name: envoy.filters.network.http_connection_manager
typed_config:
"@type": type.googleapis.com/envoy.extensions.filters.network.http_connection_manager.v3.HttpConnectionManager
stat_prefix: ingress_http
access_log:
name: envoy.access_loggers.file
typed_config:
"@type": type.googleapis.com/envoy.extensions.access_loggers.file.v3.FileAccessLog
path: /tmp/access.log
codec_type: AUTO
route_config:
name: local_route
virtual_hosts:
- name: ng1_service
domains: ["*"]
routes:
- match:
prefix: "/"
route:
cluster: ng1_service
- name: ng2_service
domains: ["ng2.ocft.com"]
routes:
- match:
prefix: "/"
route:
cluster: ng2_service
http_filters:
- name: envoy.filters.http.router
typed_config:
"@type": type.googleapis.com/envoy.extensions.filters.http.router.v3.Router
- "@type": type.googleapis.com/envoy.config.listener.v3.Listener
name: tcp_listener
address:
socket_address: { address: 0.0.0.0, port_value: 5236 }
filter_chains:
- filters:
- name: envoy.filters.network.tcp_proxy
typed_config:
"@type": type.googleapis.com/envoy.extensions.filters.network.tcp_proxy.v3.TcpProxy
stat_prefix: tcp_proxy
cluster: proxy_cluster
access_log:
name: envoy.access_loggers.file
typed_config:
"@type": type.googleapis.com/envoy.extensions.access_loggers.file.v3.FileAccessLog
path: /tmp/access-tcp.log
  1. cds.yaml
1
2
3
4
5
6
7
8
9
10
11
12
13
14
15
16
17
18
19
20
21
22
23
24
25
26
27
28
29
30
31
32
33
34
35
36
37
38
39
40
41
42
43
44
# cds.yaml
resources:
- "@type": type.googleapis.com/envoy.config.cluster.v3.Cluster
name: ng1_service
connect_timeout: 1s
type: LOGICAL_DNS
lb_policy: ROUND_ROBIN
load_assignment:
cluster_name: ng1_service
endpoints:
- lb_endpoints:
- endpoint:
address:
socket_address:
address: nginx1
port_value: 80
- "@type": type.googleapis.com/envoy.config.cluster.v3.Cluster
name: ng2_service
connect_timeout: 1s
type: LOGICAL_DNS
lb_policy: ROUND_ROBIN
load_assignment:
cluster_name: ng2_service
endpoints:
- lb_endpoints:
- endpoint:
address:
socket_address:
address: nginx2
port_value: 80
- "@type": type.googleapis.com/envoy.config.cluster.v3.Cluster
name: proxy_cluster
connect_timeout: 1s
type: STRICT_DNS
load_assignment:
cluster_name: proxy_cluster
endpoints:
- lb_endpoints:
- endpoint:
address:
socket_address:
address: 10.59.100.96
port_value: 5236

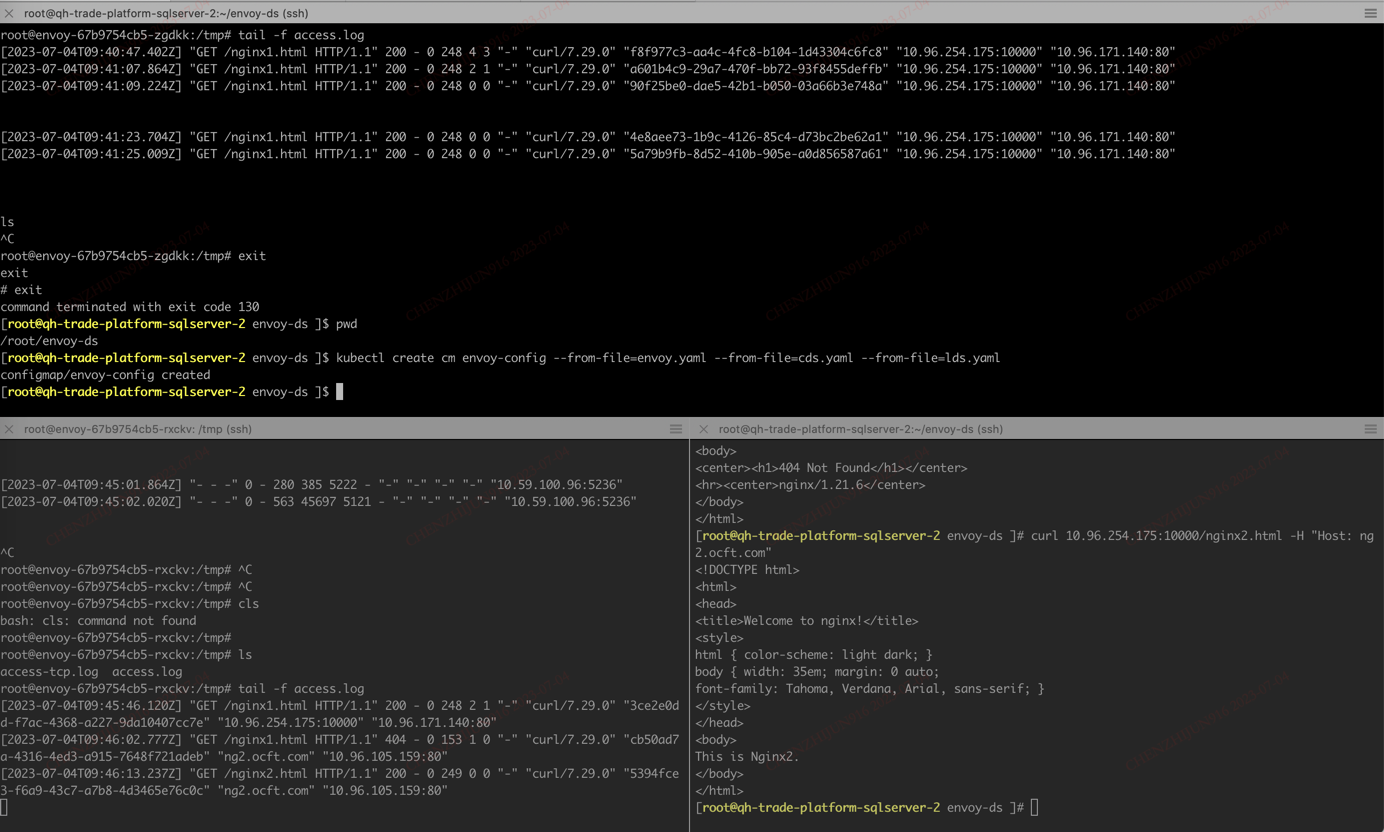
  1. 对于 envoy 的配置,需要把 configmap 中的配置进行一些微调:
1
2
3
4
5
6
7
8
9
10
11
12
13
14
15
16
17
18
19
20
21
22
23
24
25
26
27
28
29
30
31
32
33
34
35
36
37
38
apiVersion: apps/v1
kind: Deployment
metadata:
labels:
run: envoy
name: envoy
spec:
replicas: 1
selector:
matchLabels:
run: envoy
template:
metadata:
labels:
run: envoy
spec:
containers:
- image: 10.59.100.108/cbt-team/envoyproxy/envoy-dev
name: envoy
ports:
- containerPort: 10000
- containerPort: 5236
volumeMounts:
- name: envoy-config
mountPath: "/etc/envoy"
volumes:
- name: envoy-config
configMap:
name: envoy-config
items:
- key: envoy.yaml
path: envoy.yaml
- key: cds.yaml
path: conf.d/cds.yaml
- key: lds.yaml
path: conf.d/lds.yaml
imagePullSecrets:
- name: image-secret

envoy-sds

记录

  1. match: { prefix: “/“ } 本来想在这里加上”/ng1”,测试发现,它是会增加一个path,原来的路径比如是localhost:10000/index.html可以访问的,会变成localhost:10000/ng1/index.html 这样的路径,这就需要在后端服务做一些配置了。

本文标题:Envoy 介绍与用法

文章作者:

发布时间:2023-07-03 20:24:37

原始链接:http://chenzhijun.top/2023/07/03/envoy-basic/

许可协议: 署名-非商业性使用-禁止演绎 4.0 国际 转载请保留原文链接及作者。

坚持原创技术分享,您的支持将鼓励我继续创作!